

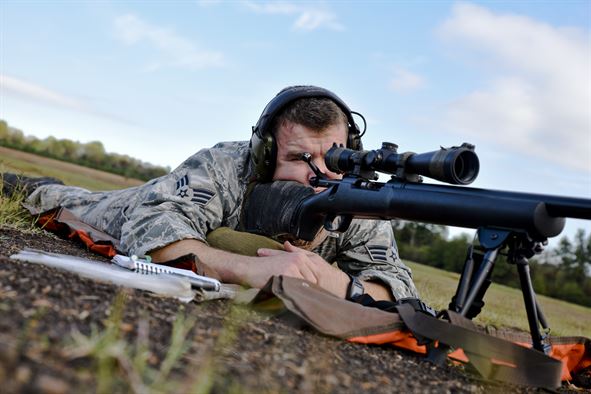
Whether its a new optic, new rifle, or opening day of deer season, your odds at a successful day in whatever your firearm sport of choice is will greatly increase if you put the time into your rifle sighting. Here are some tips for getting on the paper and into the black.
Getting Started
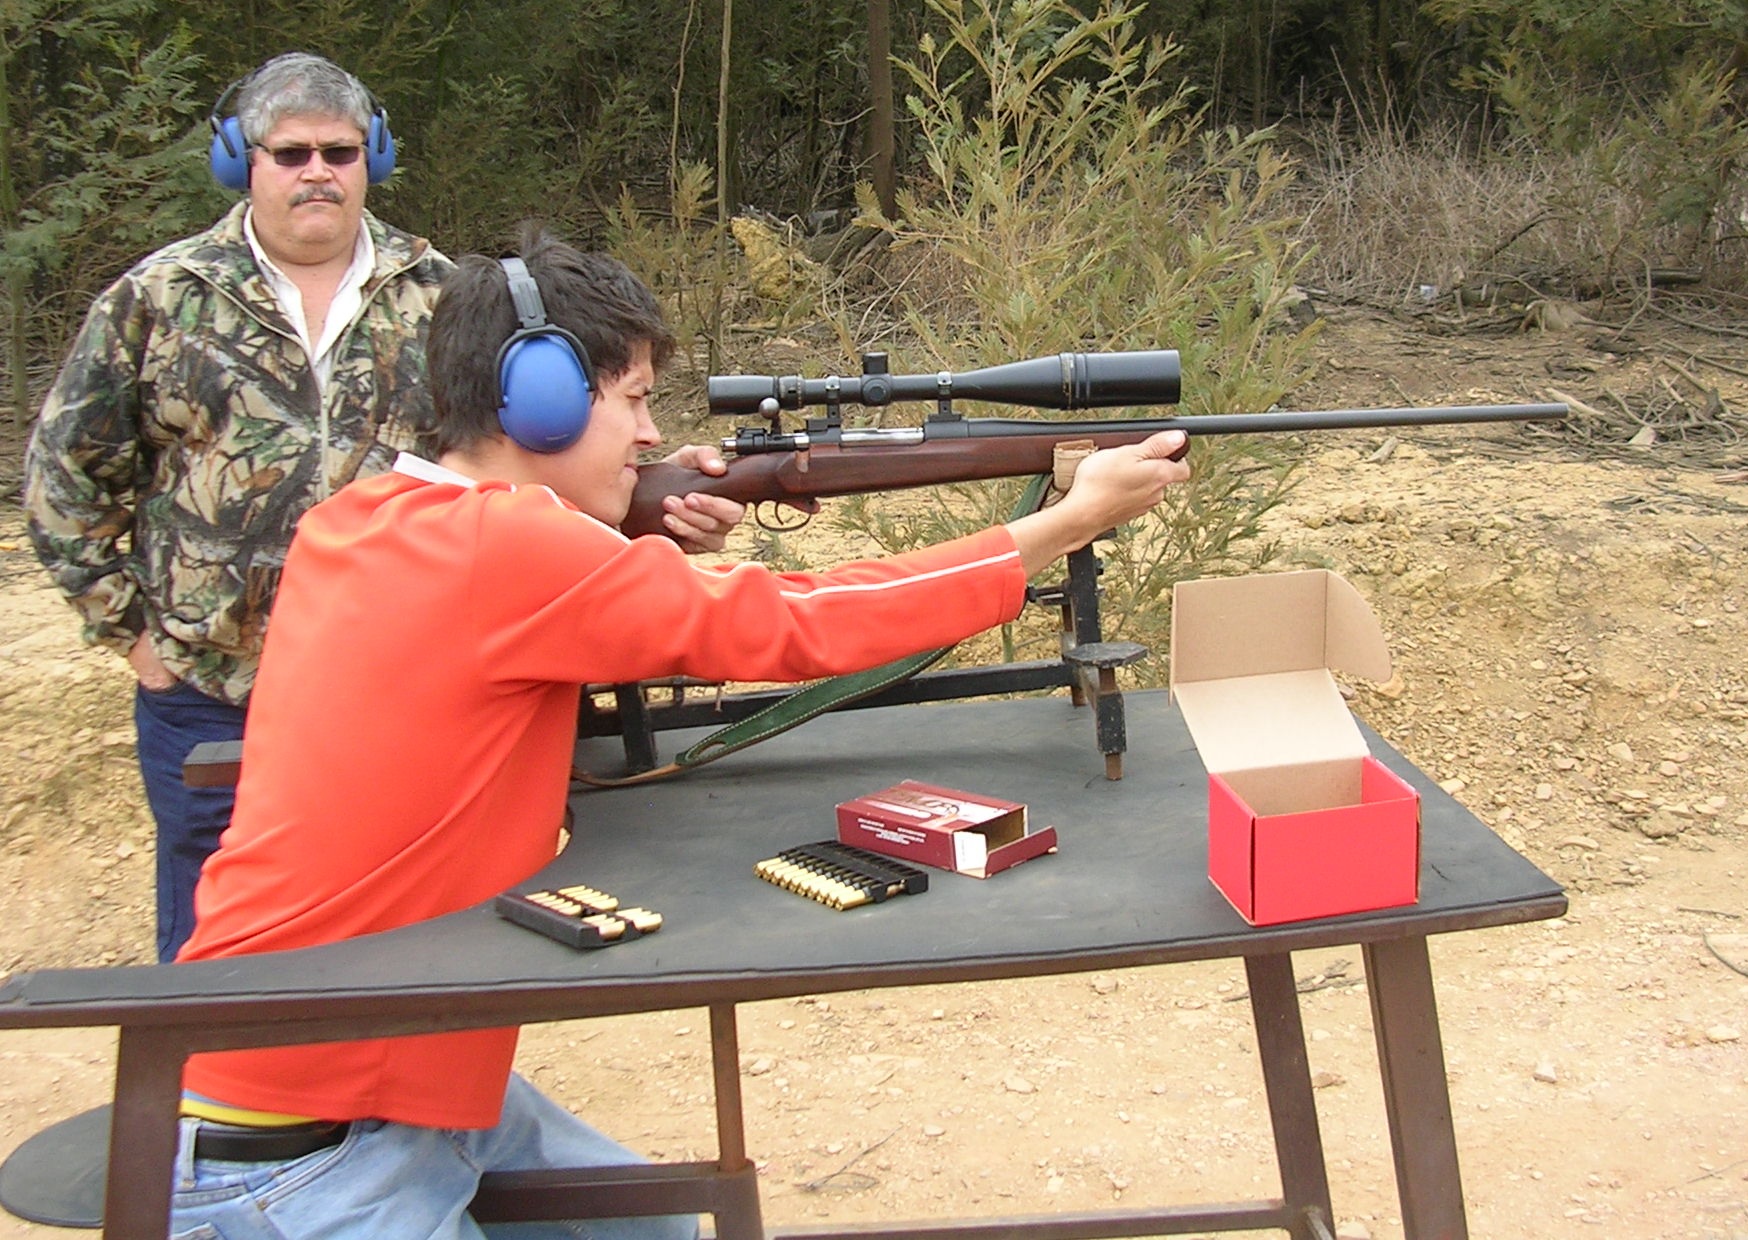
There are a couple of little tweaks you can make with your rifle sighting before hitting the range to help your grouping and “zeroing” process run quickly and smoothly. The first is using a laser bore sight. Some popular outdoorsman stores may offer a free mounting and sighting when you purchase an optic. Laser bore sighting is the method they use. You can purchase bore sights, which are essentially little laser pointers, for your caliber rifle. Stick the laser in the business end of your rifle. Some lasers can be inserted directly into the chamber. Assume a stable firing position. Identify a point at, preferably, 25 yards. Place your crosshair or sight aperture on that point and turn on the laser. The idea is that where your laser is pointing is where a bullet would impact. Now adjust your windage and elevation knobs until your sight aperture and the laser are together.
This method isn’t a cure-all to actually shooting at the range as ballistic characteristics change based on the cartridge, manufacturer, caliber, atmospherics, and a metric shit-ton of other factors. There is no substitute to actually getting out with the ammunition you plan on using and putting holes in targets.
Precision vs. Accuracy
Now some of you may know I dabble in the world of field artillery as a hobby. With long-range ballistics, there are two characteristics we are trying to accomplish: precision and accuracy. This may confuse some of you but these are not the same things. You can be precisely inaccurate. Precision has to do more with consistency. If you were standing at a free throw line and shot five free throws and all five hit the front of the rim but did not go in, congratulations, you are precisely inaccurate. Now if all five hit different parts of the rim/backboard but the last one swished, you were accurate, once, but not precise.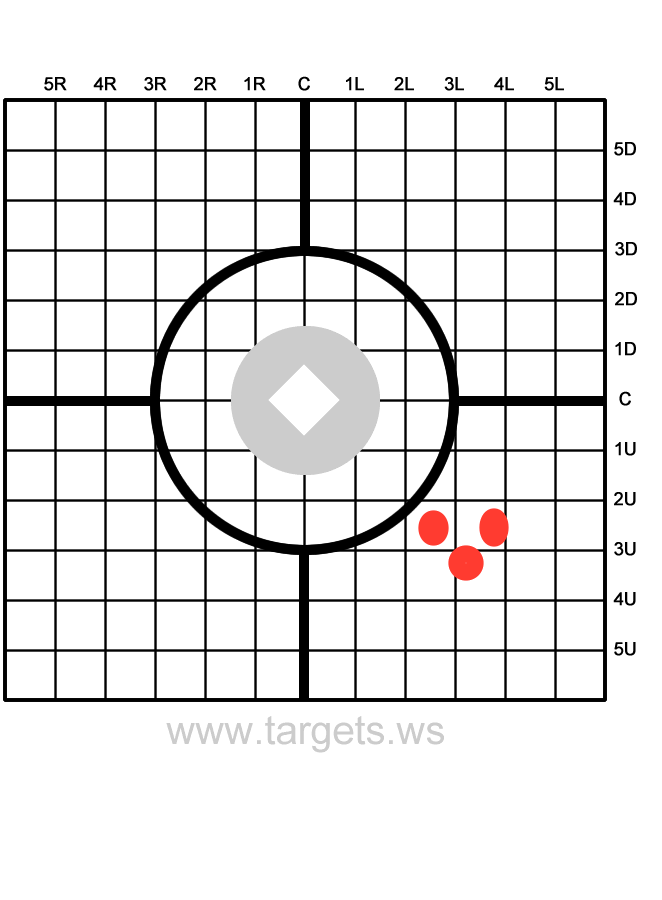
Now apply that logic to your rifle sighting. If you fired three rounds and all three are within 1/4in of each other, you have precise grouping regardless of where they land on the paper. Shoot three more rounds to ensure your precision. If they aren’t “bullseyes” you simply need to adjust your accuracy. This is accomplished through adjustments of “minute of angle” or MOA.
Minute of Angle
Understanding minute of angle can help you quickly adjust your accuracy and even provide you with the ability to quickly and easily compensate for changes in distances and windage when out in the field. Simply put, a minute of angle is a more accurate measurement of angles than the commonly used degrees. In the artillery world, we use mils (17.7 mils in a degree or a 6400 mil circle instead of 360 degrees). In sport-shooting, we use MOA which commonly refers to 1″ for every 100 yards. This means that 1″ at 100 yards is 1 MOA but 2″ at 200 yards is also still 1 MOA. 3″ at 300 yards, 4″ at 400y yards and so on.
Here’s why it’s more accurate. If you are shooting a target at 100m and you miss 3″ to the right or 3 MOA, you’re going to miss a target at 450m by over 1 foot (3 x 4.5 = 13.5″)! To put it in perspective, there are 60 MOA in a degree. Compared to the 17.7mil/degree in artillery, we are really fine tuning our accuracy!
Getting your rifle sighting into the Black

Now let’s take a look at our target from the precision vs accuracy discussion. Most grid targets like the one pictured here are measured for 1/4 of an inch. Now we know that if we place that target at 100 yards out and we’ve missed the target precisely we can calculate how many MOA we need to adjust our rifle sighting to get to center mass. It looks here that we are 3/4″ to the right and 3/4″ low. Check your manufacturer for the specific measurements on what one “click” on your sight aperture is equal to. Most optics measure 1/4″ or a 1/4 MOA per click. Knowing this (and because the target says so) we need to correct our optic 3 “clicks” up and 3 “clicks” left.
PRO TIP: When shooting paper targets, mark the holes from previously fired rounds. Either cover them with tape or indicate them by marker so you don’t confuse future rounds with ones from previous groups.
On the Fly Adjustments

Okay you’ve got your rifle sighting zeroed at 100 yards, are you going to be spot on at any range? The short answer is no. But don’t worry, I’ve got your back. A salty old Ranger Regiment Master Sergeant taught me this one. Utilizing an Allen wrench or whatever method is applicable for your scope, carefully loosen the cap, or the portion of the knob with numbers on it so that twisting it does not change your adjustments. Now replace the knob so that the number “0” is indicated. You have now literally zeroed your rifle.
What this allows you to do is change your rifle sighting for interval distances such as 200 or 300 yards. Simply write down how many “clicks” or turns you applied to your knob from zero at each range. Next time you have that trophy buck 300 yards away, just pull out your adjustment note and quickly apply it. Winner winner, venison dinner.
Two Truths and A Lie
Truth #1:
Ballistics is a complicated practice. Rarely do we have the time or means to compensate for all factors that affect trajectory and muzzle velocity before each shot and at any range. So many other factors affect the accuracy of each individual round that the tips in this article are really only mitigations of some aspects that we can actually control. So don’t send me hate-mail when you send a flyer down range and spook that thirty-pointer.
Truth #2:
You can further enhance your accuracy through compensations by checking with the manufacturer of your ammunition of choice. Some ammo companies have useful charts that can help you apply windage and distance corrections for each specific load they produce. However, reference truth #1; the data for these cartridges were gathered in a vacuum. An average of all averages for every rifle at a set distance, at 59 degrees Fahrenheit at sea level. What this means is unless you’re firing under those exact conditions, you will have varied results.
The Lie:
I wanted to include this because I hear it often among novice and expert shooters alike. The idea that if you zero a weapon at 25 yards it will be dead on at 100. The thought of this comes from the ballistic flight path relative to the sight line. A fired round exits the barrel and intersects a point of aim (a straight line from scope to target) at 25 yards, continues to rise until gravity and velocity change causes the round to fall and re-intersect the sight line a second time, at 100 yards. This is not necessarily accurate. Typically, most cartridges are going to be about 3″ high. For some, this is good enough, but it is not “dead on”.


