

Beer is a wonderful beverage. It’s a social lubricant that makes talking to boring people better. We evolved with it because it’s the first flavored beverage we learned how to make. We get a hit of feel-good chemicals as soon as the first taste hits our lips. It is the reason we have agriculture, writing, and even refrigeration. That’s why you should learn the brewing of beer.
Beyond that, the process teaches delayed gratification and an actual craft. Brewing beer is a wonderful skill for several reasons. It can be done with minimal equipment, it’s not particularly difficult, and even a bad batch is still better than Budweiser. You made it, you share it with your friends, and when people come over they need not bring beer. You can invite people interested in the brewing process over to brew with you. It’s all around a great activity and one that builds friendships.
What You Need to Make Beer
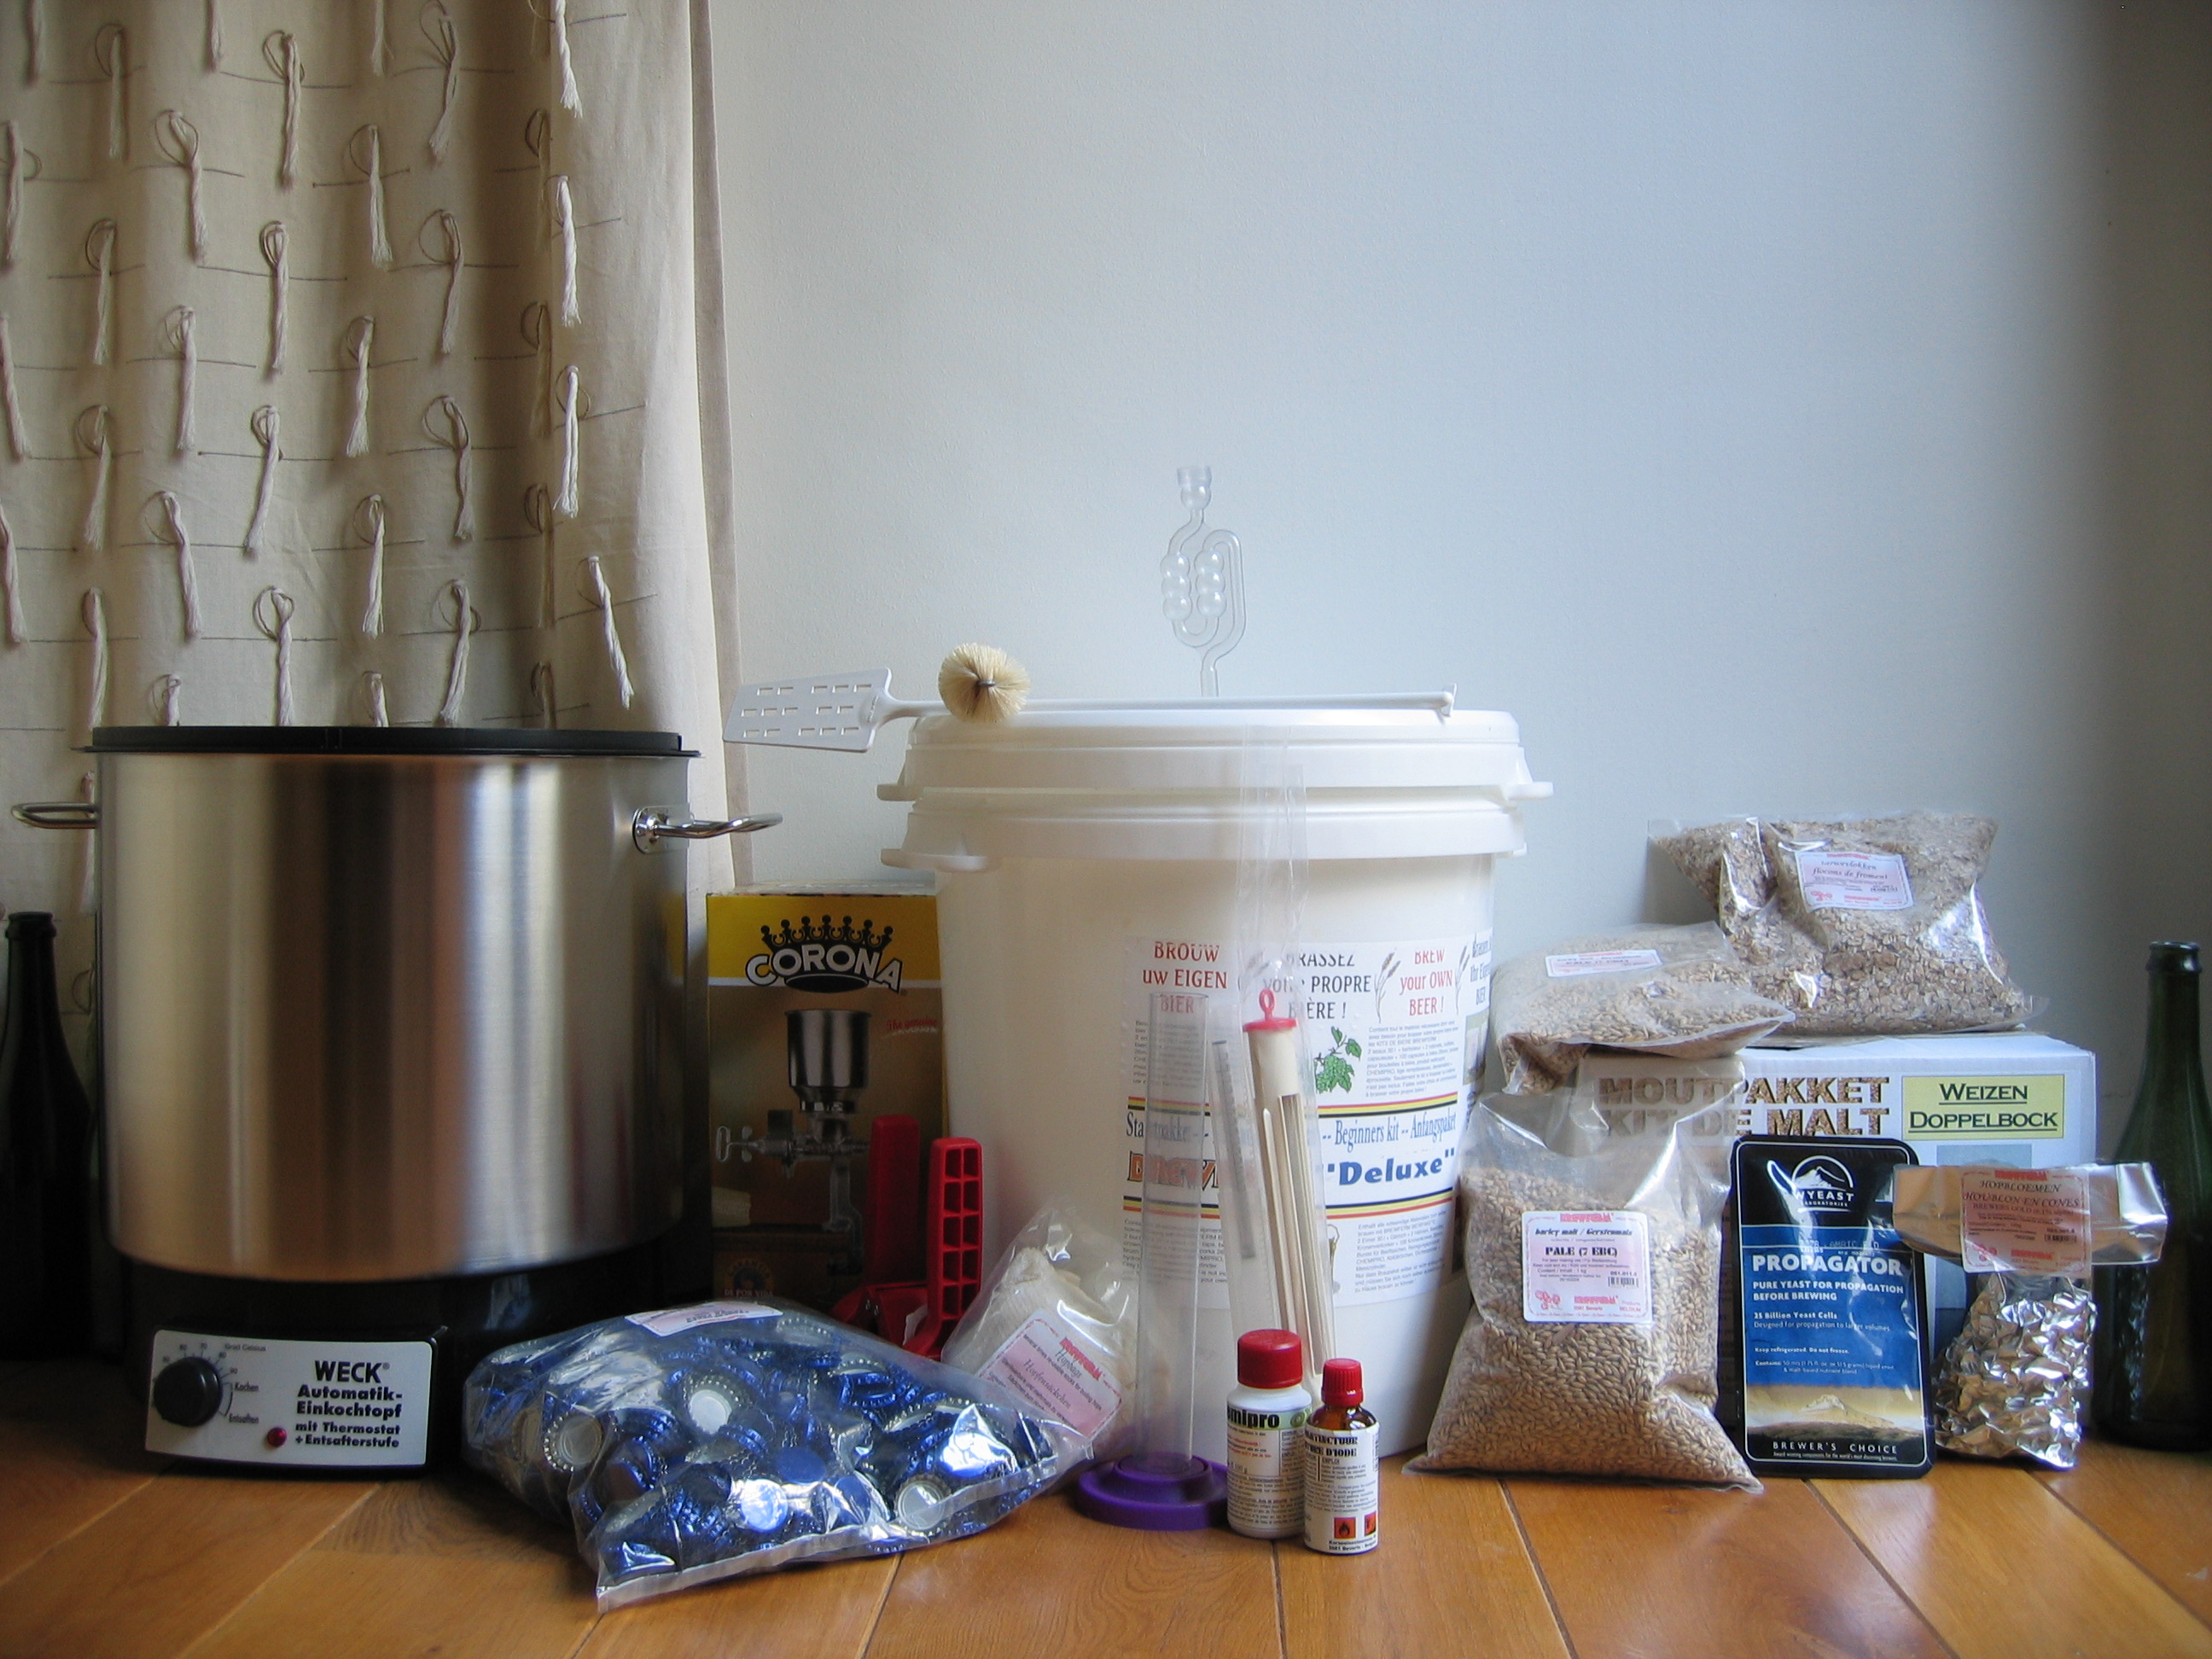
For now, we’re going to cover the ultra-basics of beer making as well as the bare minimum in required equipment without getting too much into the theory. Ingredients for making a simple ale are a source of sugar, a source of clean water, a fermenting agent, a preservative/ flavoring, and time.
As for equipment, you need a boiling vessel that holds slightly more water than you’d like to turn into beer, a decent thermometer, a fermentation vessel that lets out gas, and a means of sterilizing everything. For that last part, heat works on some of it but an acid sterilizer like Star San is required for the items that don’t touch heat. It’s also good to have containers for the finished product, but we’ll count that as an item for later.
Typically, ready-made ale kits are sold all over the country. They range in price from $20 to $70 (for the more complex ones). They range in size from 1 gallon (the smallest practical size batch) through about 15 gallons. The standard size for a batch is about 5 gallons. A five-gallon batch will yield 53 1/3 bottles of beer at 12 oz./ bottle. In practice, some of the beer will be no good and we’ll cover why later.
The actual equipment
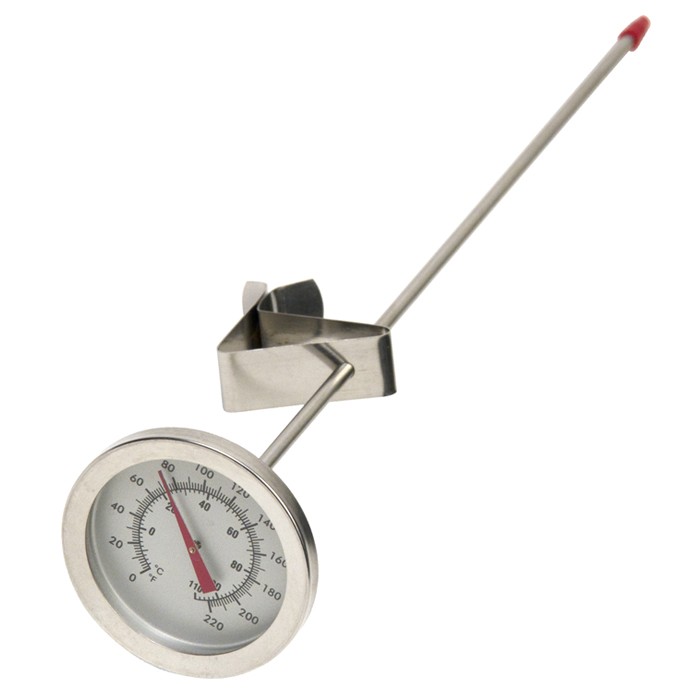
Thermometer
The better the thermometer, the better the results. If you’re thinking about using the meat thermometer from your kitchen, you certainly can. We recommend, however, getting a good one that has never been used in meat. Fats can ruin a beer, and most meat thermometers have a probe (the pointy part that you stick into the liquid) that’s far too short. Your thermometer needs to be capable of staying in the boil kettle throughout the process, and meat thermometers tend to be awkward for that purpose.

Boil Kettle
This is important but it’s a one-time expense. If you’re making one-gallon batches, you likely have an adequate stock pot in your kitchen. If you’re making five-gallon batches, you need a boil kettle that holds a minimum of 22 quarts. You need extra space for boil over protection. 42 quarts is more versatile and not much more expensive and will enable you to do a ten-gallon batch if you so desire. If you want the option of boiling larger batches, you’ll need a larger pot. Fifteen-gallon batches require a minimum of a 64-quart pot. Remember that boiling larger quantities of water either takes more heat or more time (usually both).
Stir Paddle/ Spoon
If you recall the lunch lady and her magic serving spoon, you’re on the right track for the stirring spoon. Even better, a long wooden paddle. You need something that will reach the bottom of your boil kettle while keeping your fingers out of the boiling water.
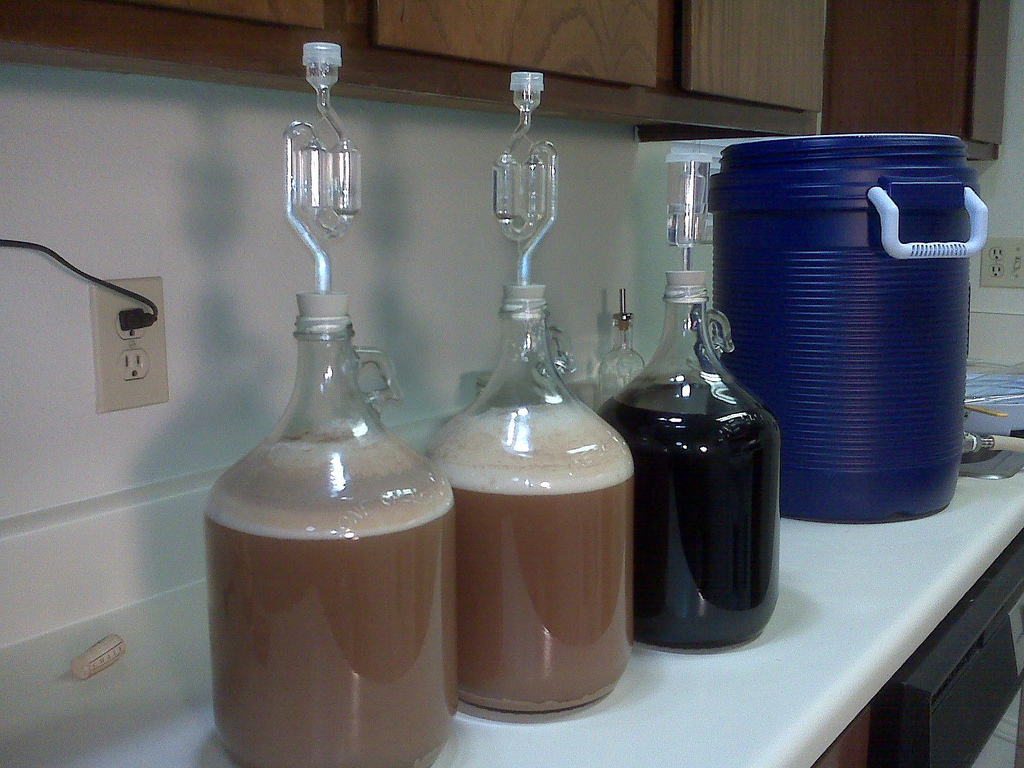
Fermentation Vessel w/ Venting System
When you’re done boiling your wort (the sweet, brown water that’s full of ‘soon-to-be beer’ sugar), you need to put it somewhere to ferment. That’s where the fermentation vessel comes in. You can use anything that’s clean that can also be sealed and vented. The typical home brewer has a glorified five-gallon bucket that serves this purpose. You can also use a glass or plastic water bottle (also known as a ‘carboy‘). Whatever you use, the goal is to keep it sealed but allow the gasses to escape. The most common method for this is a hole in the top of your fermentation vessel that uses an airlock. The airlock consists of a layer of sterile water that allows bubbles to pass from the wort to the outside air without allowing the outside air into the fermentation vessel.
Timer
If you have a smartphone you have all you need for this purpose. Every smartphone has an alarm clock app or a timer app which can be purposed for brewing. There are also apps specifically designed for brewing. Most of them are not free, but like most things of this kind, you get what you pay for. For the time being, we’ll assume your phone is fine for this task.
Heat source
You can’t boil water without heat. If you figure out a way, call me. What should you use, though? When brewing beer, I’ve used a stove top in my kitchen, a wood stove in a guy’s garage, an open fire using pine logs, an electric burner that was computer controlled, and the most common method, a propane burner in an open garage or outside. Whatever you use, you need to make sure you can boil the size batch you intend to make in the shortest time possible. More heat faster is best. More BTUs gets you to beer faster.
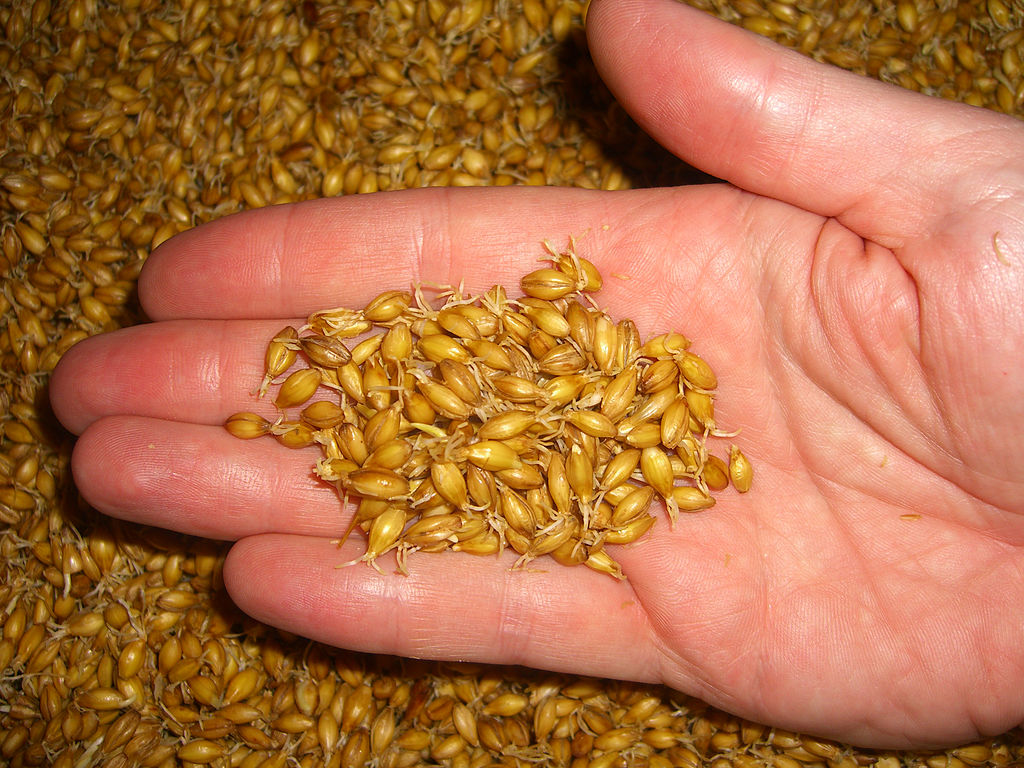
Ingredients
This is a section in itself, but the basics are a sugar source which should be fine, malted barley, a good strain of hops, and water. That along with heat and time are all that goes into a simple beer. Kits for starting out arrive with all of the above, as well as extras that you will need to finish the recipe. When you get better, you’ll undoubtedly experiment with all the possibilities.
Cooling System (optional)
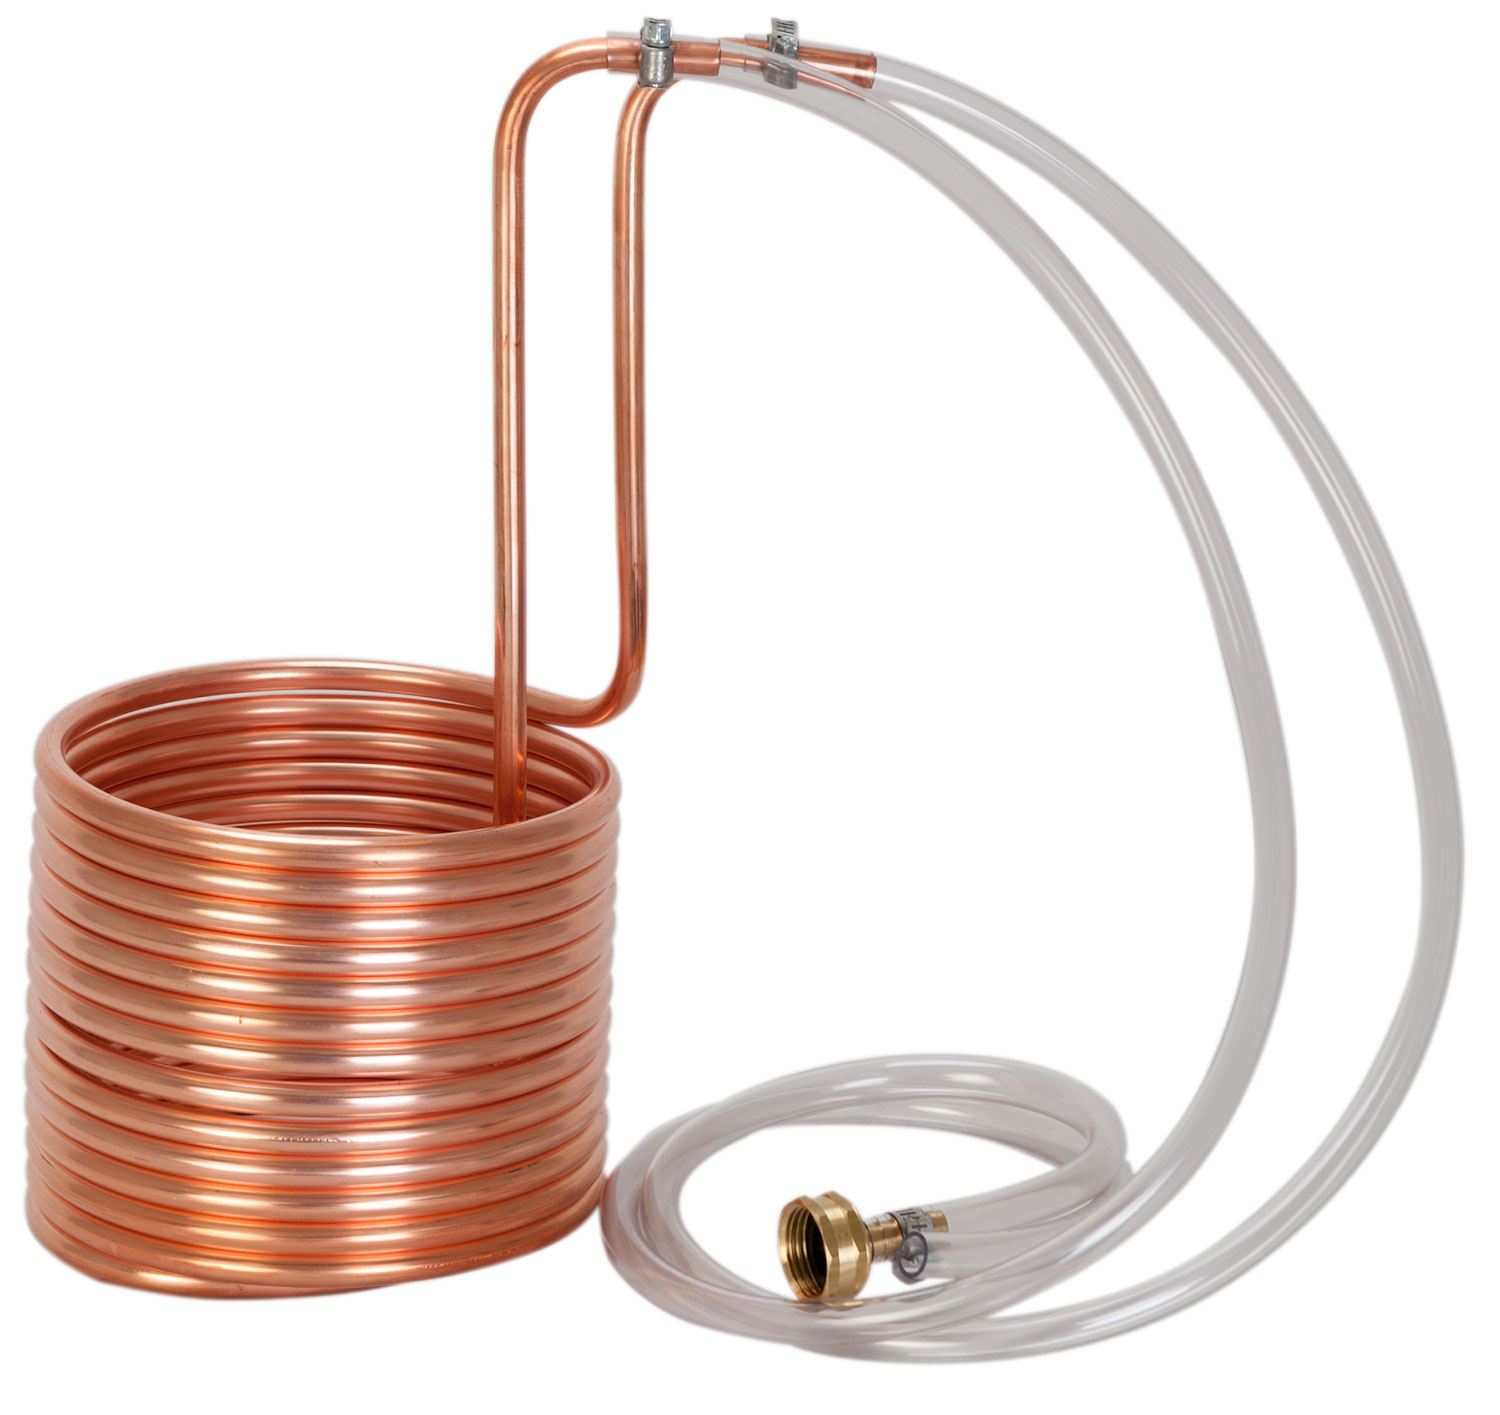
The faster you cool your wort after you complete the boil, the better. The cooling system can be an expensive option for some, but waiting for five gallons of boiled water to cool to room temperature can be tedious. Not only that but the longer your wort is open to the elements, the more likely it is to pick up some bacteria that you absolutely don’t want. The typical coolers are devices that hook up to your garden hose which you immerse in the wort. You turn on the hose and the hose water picks up heat from the wort cooling it. Every step beyond this gets progressively more expensive.
I’ve connected two immersion chillers in series, one in the wort and one before it in an ice bath, to speed up the process. Doing this while also immersing the pot full of wort in a larger pot filled with ice makes quick work of chilling. Experimentation is good, though, when brewing beer.
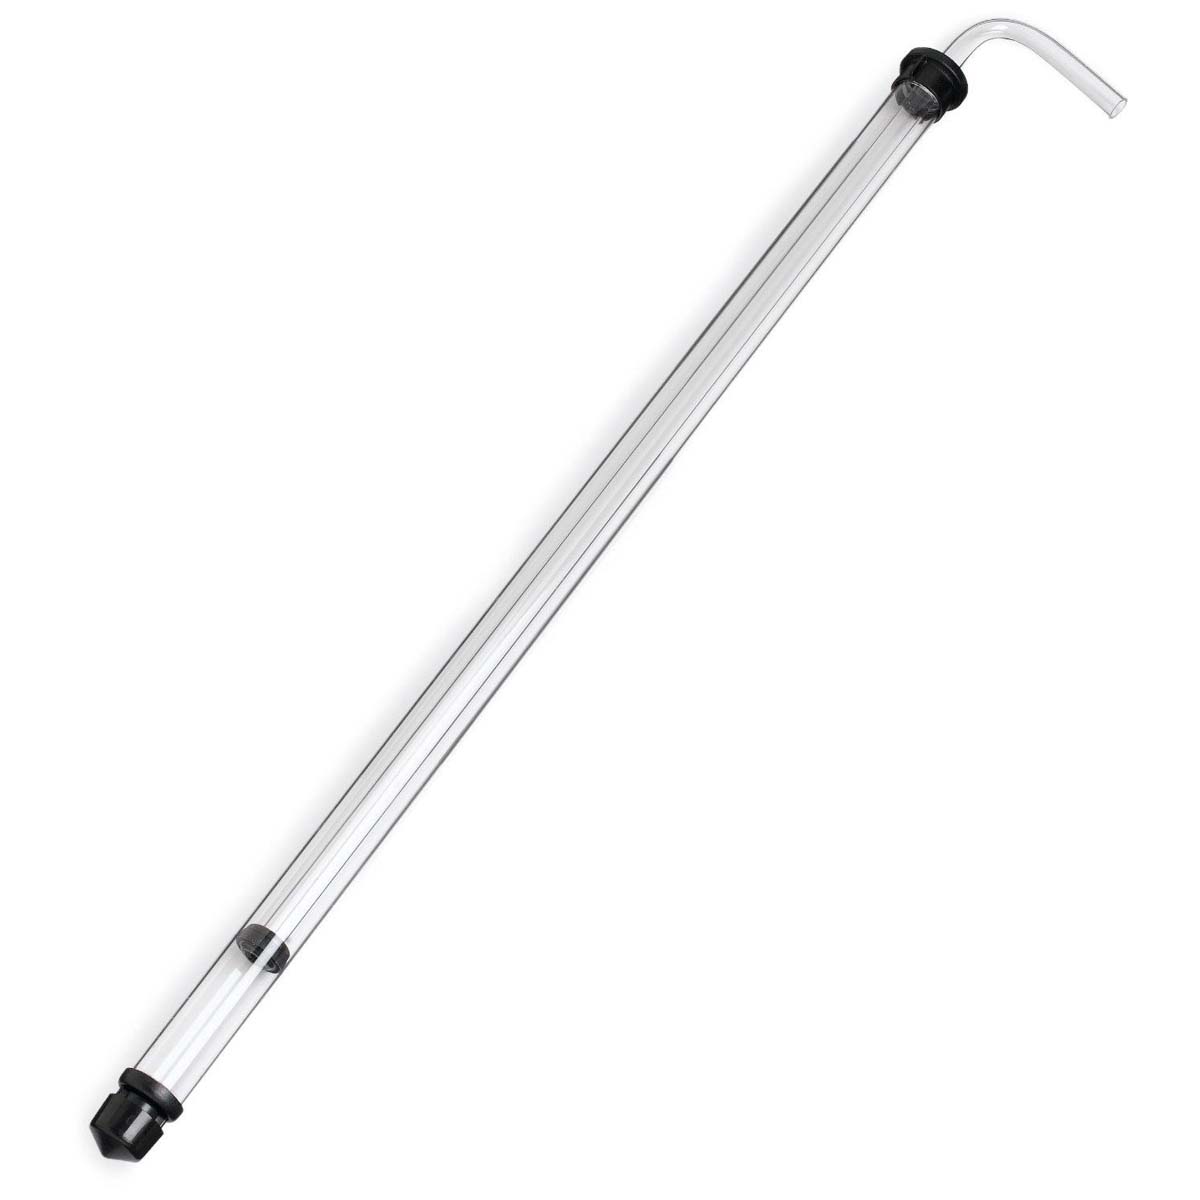
Siphon (optional)
Moving your beer from one container to another is far easier with a siphon. If you opt not to have one, muscle and some funnels are your other option. Ask for help when pouring. We don’t want to be responsible for any bad backs.
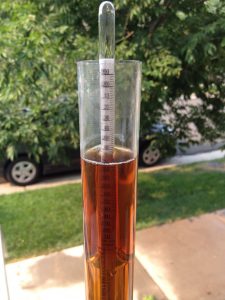 Hydrometer/ Refractometer (optional)

If you want to know how much alcohol is in your beer, you’ll absolutely need a way to measure your specific gravity. You need to take two measurements. One just before you add yeast (called ‘pitching’) and one just before you bottle. A simple mathematical formula tells you how drunk you’ll get on 4 of your new beers. This is listed as ‘optional’ but it’s really not optional if you care about the craft.
Stay Tuned
That’s all for today. As for the actual method of brewing beer, stay tuned for my breakdown of how to use the equipment, malts, hops, and yeast to get something you can actually drink.


